DIY: Make Plant Fertilizer from Kitchen Waste Easily
Kitchen waste can become effective homemade plant fertilizer when you compost it, brew it into diluted compost tea, or bury safe plant-based scraps as slow-release soil amendments. Use fruit and vegetable peels, coffee grounds, eggshells, and tea leaves, while avoiding meat, dairy, oily food, and salty scraps that attract pests or damage roots.
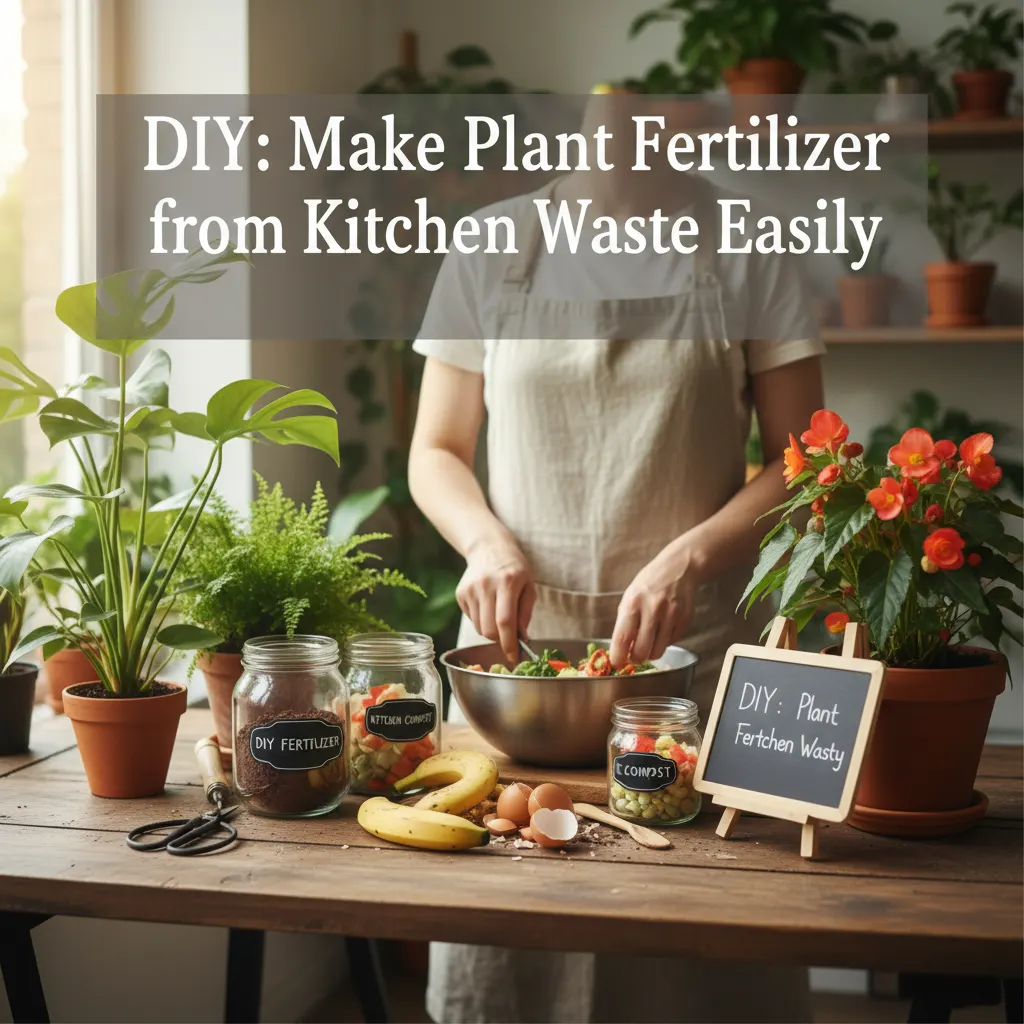
Transforming kitchen waste into nutrient-rich plant fertilizer is a sustainable and cost-effective way to nourish your garden. By utilizing common food scraps, you can create compost, compost tea, or direct soil amendments that boost plant health and reduce landfill waste.
Gardening enthusiasts and eco-conscious individuals are constantly seeking sustainable methods to nurture their plants. The good news is that a treasure trove of plant-boosting nutrients often goes straight into the trash: your kitchen waste. Instead of discarding fruit peels, coffee grounds, and eggshells, you can easily convert them into powerful, organic fertilizers that will make your garden thrive. This guide will walk you through the simple, effective ways to turn everyday kitchen scraps into gold for your plants, reducing waste and fostering a healthier, more vibrant garden.
What Kitchen Scraps Are Best for Homemade Fertilizer?
Fruit and vegetable peels, coffee grounds, tea bags, and eggshells are excellent sources of nitrogen, phosphorus, and calcium, making them ideal for enriching your garden soil.
Many common kitchen scraps are packed with essential nutrients that plants need for healthy growth. Understanding which items to save and why can significantly enhance your homemade fertilizer efforts. For instance, banana peels are rich in potassium, vital for flowering and fruiting. Coffee grounds provide nitrogen, which promotes lush, green foliage, and also help to acidify the soil, benefiting acid-loving plants like blueberries and azaleas. Eggshells are a fantastic source of calcium, crucial for strong cell walls and preventing blossom end rot in tomatoes and peppers. Vegetable scraps, such as potato peels, carrot tops, and leafy greens, contribute a broad spectrum of micronutrients. Even used tea bags can be beneficial, adding nitrogen and improving soil structure. By consciously collecting these items, you're not just reducing waste; you're building a nutrient powerhouse for your garden.
How to Make Nutrient-Rich Compost from Kitchen Waste?
Layer green (nitrogen-rich) and brown (carbon-rich) kitchen scraps in a compost bin, ensuring proper aeration and moisture. This decomposition process yields a versatile soil amendment.
Composting is the cornerstone of turning kitchen waste into a valuable soil amendment. It's a natural process where organic materials decompose into a dark, crumbly, nutrient-rich substance called humus. To start, you'll need a compost bin or a designated pile in your garden. The key to successful composting is balancing 'greens' (nitrogen-rich materials like fruit and vegetable scraps, coffee grounds, and grass clippings) with 'browns' (carbon-rich materials like dried leaves, shredded newspaper, and small twigs). A good ratio is typically two parts browns to one part greens. Layering these materials, keeping the pile moist (like a wrung-out sponge), and turning it regularly for aeration will accelerate decomposition. Chopping larger scraps into smaller pieces also helps. Over several weeks to months, microorganisms will break down the waste, transforming it into a dark, earthy compost ready to enrich your garden beds, improve soil structure, and provide a slow-release source of nutrients.
Step-by-Step: Creating Liquid Compost Tea for Plants
Steep finished compost or select kitchen scraps in water for 24-48 hours. Strain the liquid to create a nutrient-rich 'tea' that can be diluted and used as a foliar spray or soil drench.
Compost tea is a liquid fertilizer that delivers nutrients directly to plant roots and leaves, offering a quick boost. It's made by steeping finished compost or specific kitchen scraps in water. To make a basic compost tea, fill a 5-gallon bucket with water and add a shovel-full of mature compost or a mix of nutrient-rich scraps like banana peels, coffee grounds, and eggshells (crushed). You can place the scraps in a porous bag (like an old pillowcase or cheesecloth) to make straining easier. Let this mixture steep for 24 to 48 hours, stirring occasionally to aerate it. The water will turn a brownish color, indicating that nutrients have leached into the liquid. After steeping, strain out the solids. The resulting 'tea' is concentrated and should be diluted with water (typically 1:10 ratio for general use) before applying. Use it as a soil drench around the base of plants or as a foliar spray directly on leaves, preferably in the early morning or late evening to avoid scorching.
Direct Application: Using Kitchen Scraps as Soil Amendments
Certain kitchen wastes like coffee grounds and crushed eggshells can be directly incorporated into the soil around plants, providing slow-release nutrients and improving soil structure.
Not all kitchen waste needs to go through the full composting process before benefiting your plants. Some scraps can be directly applied to the soil, offering immediate and long-term advantages. Coffee grounds, for example, can be sprinkled directly around acid-loving plants like roses, blueberries, and hydrangeas. They slowly release nitrogen, improve soil drainage, and can even deter some pests. Crushed eggshells can be worked into the soil around tomatoes, peppers, and other calcium-hungry plants to prevent blossom end rot and provide a steady supply of calcium. Banana peels, cut into small pieces, can be buried near the base of flowering plants to provide a potassium boost. Just be sure to bury scraps a few inches deep to prevent attracting pests. This method is particularly useful for targeted nutrient delivery and improving specific soil conditions without the need for a full compost system.
Which Kitchen Wastes Should You Avoid in Homemade Fertilizers?
Avoid meat, dairy, oily foods, and diseased plant material, as these can attract pests, create foul odors, and introduce pathogens to your compost or garden.
While many kitchen scraps are beneficial, some should be kept out of your homemade fertilizers and compost. Meat and fish scraps, bones, and dairy products (milk, cheese, yogurt) can attract rodents, flies, and other pests, and they decompose slowly, often producing foul odors. Oily foods, such as cooking oils, salad dressings, and greasy leftovers, can create anaerobic conditions in compost, slowing decomposition and leading to unpleasant smells. Pet waste (dog or cat feces) should also be avoided due to potential pathogens that could be harmful to humans if transferred to edible plants. Diseased plant material from your garden should not be composted, as the pathogens might survive the composting process and reinfect healthy plants. Stick to plant-based, unprocessed food scraps to ensure a healthy, odor-free, and pest-free composting and fertilizing experience.
Problem Definition: Why Homemade Fertilizer?
Many gardeners face challenges with soil depletion and the high cost of commercial fertilizers, often leading to reliance on synthetic products that can harm soil health and the environment. Homemade fertilizers offer a sustainable, cost-effective alternative.
Commercial fertilizers, while effective, can be expensive and often contain synthetic chemicals that, over time, can degrade soil structure, harm beneficial microorganisms, and contribute to water pollution through runoff. Gardeners frequently struggle with nutrient deficiencies in their soil, leading to stunted growth, poor yields, and increased susceptibility to pests and diseases. The desire for organic, sustainable gardening practices has grown significantly, pushing many to seek natural solutions. Homemade fertilizers address these issues by recycling readily available kitchen waste, enriching the soil with natural nutrients, improving soil biology, and reducing household waste destined for landfills. This approach not only saves money but also fosters a healthier, more resilient garden ecosystem.
Solution Overview: The Power of Kitchen Scraps
By transforming kitchen waste into fertilizer, you can naturally replenish soil nutrients, improve soil structure, and promote robust plant growth, all while reducing your environmental footprint.
The solution lies in harnessing the natural decomposition process of organic kitchen waste. Instead of viewing food scraps as trash, we can see them as valuable resources packed with nitrogen, phosphorus, potassium, calcium, and a host of micronutrients essential for plant life. Whether through composting, creating liquid teas, or direct soil application, these methods return vital organic matter to the soil. This not only feeds your plants but also enhances soil aeration, water retention, and supports a thriving community of beneficial microbes. The result is a healthier soil food web, leading to stronger plants that are more resistant to stress and disease, and ultimately, a more productive and sustainable garden.
Implementation Guide: Making Your Own Plant Food
Follow these steps to effectively convert your kitchen waste into nutrient-rich plant fertilizer, tailored to your gardening needs.
- Collect Your Scraps: Designate a container in your kitchen for collecting fruit and vegetable peels, coffee grounds, tea bags, and crushed eggshells. Avoid meat, dairy, and oily foods.
- Choose Your Method:
- Composting: For a long-term soil amendment, start a compost bin. Layer 'greens' (kitchen scraps) with 'browns' (dried leaves, shredded paper). Keep it moist and turn regularly.
- Compost Tea: For a liquid boost, steep a mix of finished compost or select scraps (banana peels, coffee grounds) in water for 24-48 hours. Strain and dilute before use.
- Direct Application: For targeted nutrients, sprinkle coffee grounds around acid-loving plants or bury crushed eggshells near calcium-hungry plants.
- Prepare Scraps: Chop larger scraps into smaller pieces to speed up decomposition, especially for composting or direct application.
- Apply to Plants:
- Compost: Mix finished compost into garden beds, use as a top dressing, or add to potting mixes.
- Compost Tea: Water plants at their base or use as a foliar spray (diluted 1:10).
- Direct Application: Bury scraps a few inches deep around plants to prevent pests and allow slow nutrient release.
- Observe and Adjust: Monitor your plants' response. If leaves yellow, they might need more nitrogen (coffee grounds). If flowering is poor, they might need more potassium (banana peels).
Tools and Supplies for Homemade Fertilizer
To successfully create and apply homemade plant fertilizer, you'll need a few basic tools and supplies, most of which you might already have.
- Compost Bin or Pile: Essential for traditional composting. Options range from simple DIY bins to commercial tumblers.
- Kitchen Scrap Collector: A small, lidded container for daily collection of scraps before transferring to the main compost.
- Garden Fork or Aerator: For turning and aerating your compost pile, crucial for decomposition.
- 5-Gallon Bucket: Ideal for making compost tea.
- Strainer or Cheesecloth: To separate solids from liquid when making compost tea.
- Watering Can: For applying liquid fertilizers or moistening compost.
- Gloves: To protect your hands when handling compost and soil.
- Shovel or Trowel: For mixing compost into soil or burying scraps.
- Blender (Optional): For making 'smoothie' fertilizers from scraps for a quick nutrient release.
Common Problems & Troubleshooting with Homemade Fertilizers
Even with the best intentions, you might encounter issues when making and using homemade fertilizers. Here are common problems and their solutions.
Q: Why is my compost bin smelling bad?
A: Foul odors usually indicate an imbalance of 'greens' (too much nitrogen) or a lack of aeration. Solution: Add more 'browns' (dried leaves, shredded paper) to balance the nitrogen. Turn the pile more frequently to introduce oxygen. Avoid adding meat, dairy, or oily foods.
Q: My compost isn't breaking down quickly.
A: Slow decomposition can be due to a lack of moisture, insufficient aeration, or large pieces of material. Solution: Ensure the pile is consistently moist (like a wrung-out sponge). Turn the pile regularly to aerate. Chop kitchen scraps into smaller pieces before adding them.
Q: Are pests attracted to my compost or directly applied scraps?
A: Pests like rodents or flies are often drawn to exposed food scraps, especially meat or dairy. Solution: Avoid adding meat, dairy, or oily foods. Bury fresh kitchen scraps deep within the compost pile or beneath the soil when direct applying. Use a sealed compost bin if pests are a persistent issue.
Q: My plants aren't responding to the homemade fertilizer.
A: This could be due to insufficient nutrient concentration, incorrect application, or other underlying plant health issues. Solution: Ensure your compost is mature and nutrient-rich. Dilute compost tea appropriately. Check for other problems like watering issues, light deficiencies, or diseases. Consider a soil test to identify specific nutrient gaps.
Expert Tips & Advanced Techniques
Elevate your homemade fertilizer game with these expert insights and advanced methods for maximum plant benefit.
- Vermicomposting (Worm Composting): For a highly efficient and nutrient-dense fertilizer, consider a worm bin. Red wigglers consume kitchen scraps and produce 'worm castings,' a super-rich soil amendment. It's excellent for small spaces and produces no odor.
- Bokashi Composting: This anaerobic fermentation method uses a special inoculant to ferment kitchen scraps, including meat and dairy, without odor. The fermented scraps are then buried in the garden to break down quickly, enriching the soil.
- Nutrient-Specific Teas: Create specialized teas for specific plant needs. For example, a banana peel tea for potassium-hungry flowering plants, or a nettle tea for nitrogen and iron.
- Soil Food Web Enhancement: Beyond just nutrients, homemade fertilizers introduce beneficial microbes. Consider adding a small amount of finished compost to your compost tea to inoculate it with a diverse microbial community.
- Layering in Garden Beds: When preparing new garden beds, layer kitchen scraps (buried deep), leaves, and soil directly into the bed. This 'lasagna gardening' method builds rich soil over time.
- pH Monitoring: While coffee grounds can acidify soil, be mindful of your plants' specific pH requirements. Test your soil periodically to ensure your amendments are beneficial.
FAQ Section: Your Questions Answered
Is homemade fertilizer safe for all plants?
Generally, yes, homemade fertilizers from plant-based kitchen waste are safe for most plants. However, some plants have specific pH or nutrient requirements. For example, acid-loving plants benefit from coffee grounds, while others might prefer a more neutral balance. Always dilute liquid fertilizers and apply in moderation.
How often should I use homemade plant fertilizer?
The frequency depends on the type of fertilizer and your plants' needs. Compost can be incorporated into soil annually or bi-annually. Compost tea or liquid fertilizers can be applied every 2-4 weeks during the active growing season. Direct application of scraps should be done sparingly, perhaps once a month, to avoid over-fertilization or attracting pests.
Can I use citrus peels in my compost?
Yes, citrus peels can be composted, but in moderation. Their acidity can slow down decomposition if used in large quantities, and some sources suggest they might deter beneficial worms in vermicomposting. Chop them into small pieces to speed up their breakdown.
What is the best way to store homemade fertilizer?
Finished compost should be stored in a cool, dry place, ideally in a breathable container or pile, to maintain its microbial activity. Liquid compost tea is best used within 24-48 hours of brewing, as its beneficial microbial life is short-lived. Unused direct application scraps should be buried immediately.
Does homemade fertilizer attract pests?
If not managed properly, yes. Meat, dairy, oily foods, and exposed food scraps can attract rodents, flies, and other pests. To prevent this, avoid these materials, bury fresh scraps deep within compost or soil, and use a sealed compost bin.
Summary: Nurturing Your Garden Sustainably
Transforming kitchen waste into homemade plant fertilizer is a powerful way to cultivate a healthier garden and a more sustainable lifestyle. By embracing composting, compost teas, and direct application, you can:
- Reduce Waste: Divert valuable organic material from landfills.
- Save Money: Eliminate the need for expensive commercial fertilizers.
- Boost Plant Health: Provide a rich, natural source of essential nutrients.
- Improve Soil Structure: Enhance aeration, water retention, and microbial life.
- Foster Sustainability: Contribute to a circular economy in your own backyard.
Start small, experiment with different methods, and observe how your plants respond. Your kitchen scraps are not waste; they are the building blocks for a thriving, vibrant garden. For further reading on sustainable gardening practices, explore resources from university extension programs or reputable organic gardening institutes.
Next Steps and Actionable Advice
- Start a Scrap Collection: Place a small, lidded container on your kitchen counter for daily organic waste.
- Choose a Method: Decide if you'll start with a simple compost pile, a bucket for compost tea, or direct application.
- Educate Yourself: Research specific nutrient needs of your plants to tailor your homemade fertilizers.
- Be Patient: Composting takes time, but the rewards are well worth it.
- Share Your Knowledge: Inspire friends and family to join the sustainable gardening movement.
Related Topics for Further Reading
- The Benefits of Vermicomposting for Houseplants
- Understanding Soil pH and Plant Nutrient Uptake
- Zero-Waste Gardening: A Comprehensive Guide
- How to Conduct a Simple Soil Test at Home